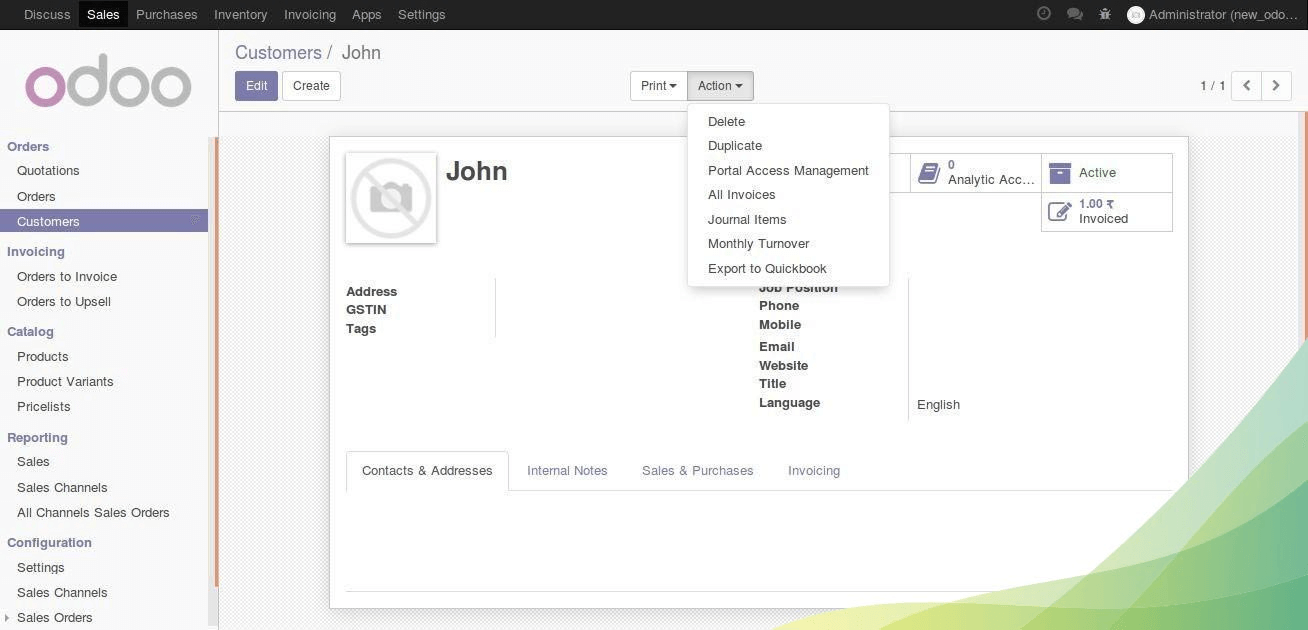
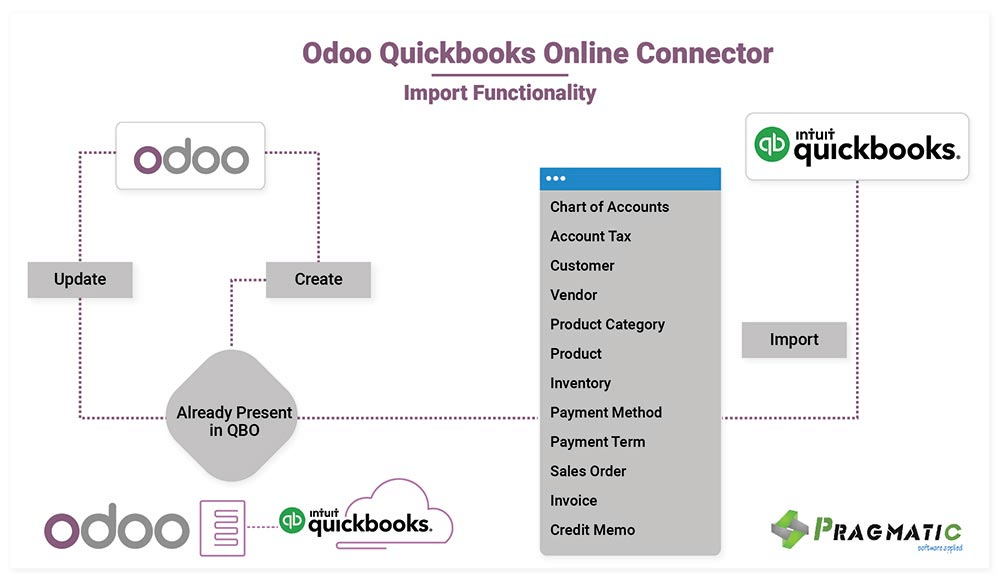
Customer

Vendor
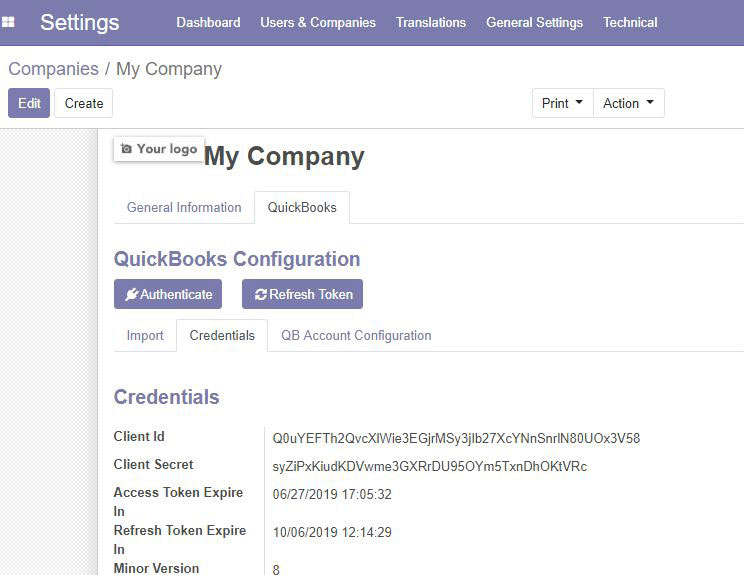
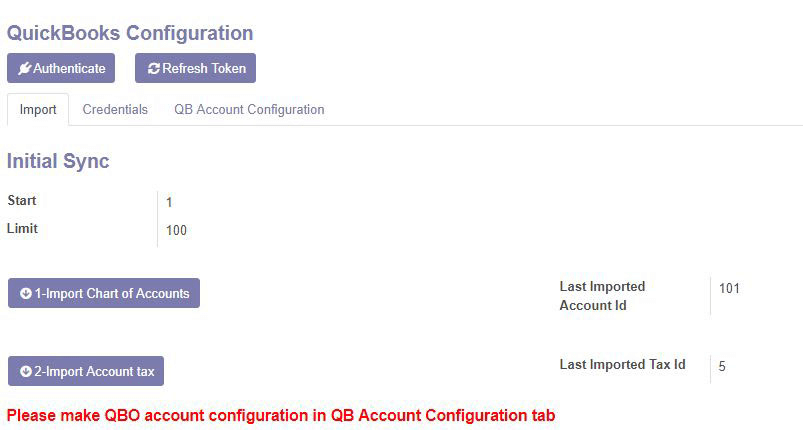
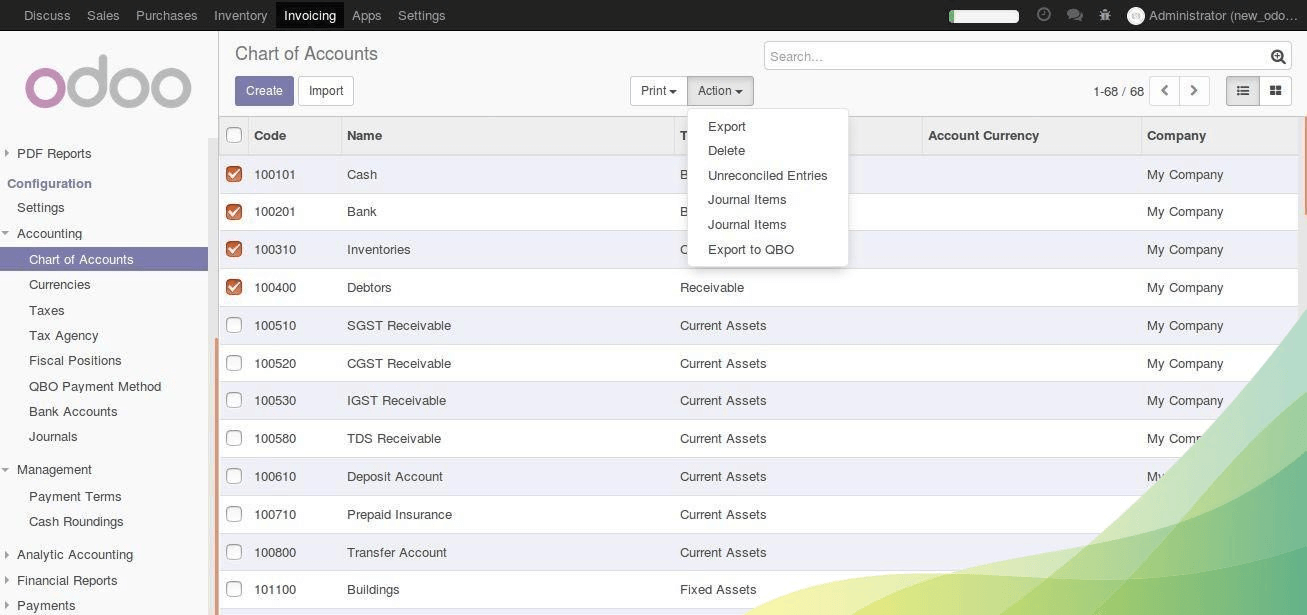
Accounts
Account Tax

Product Category
Payment Methods

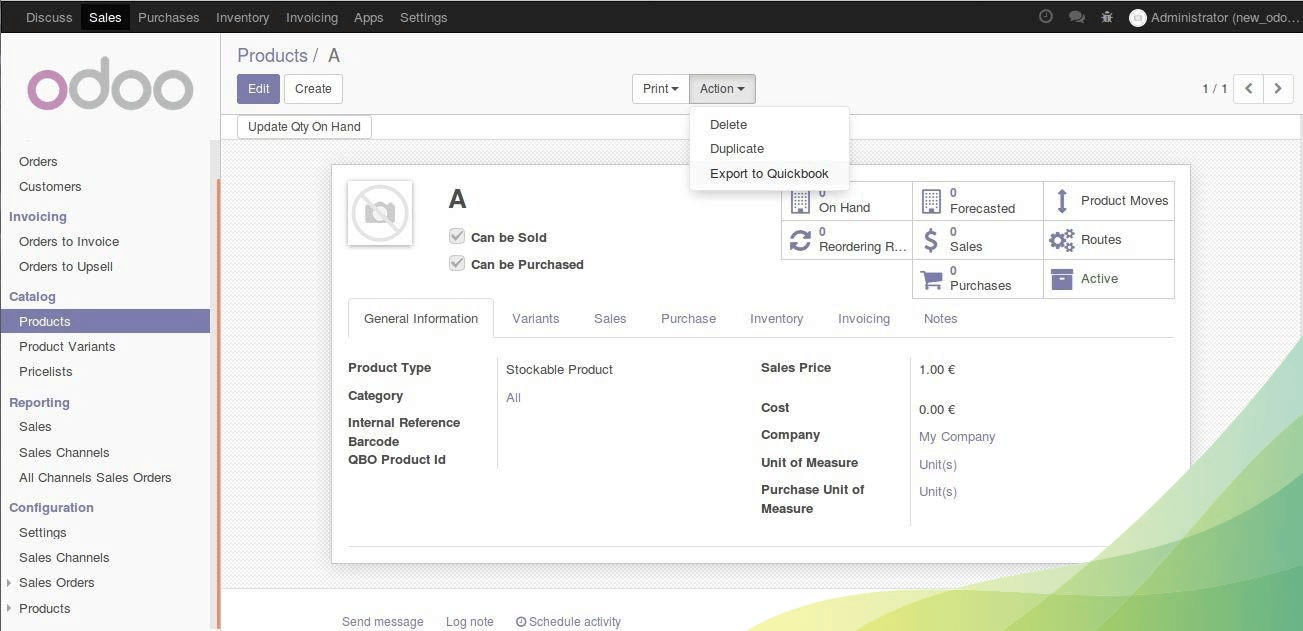
Products
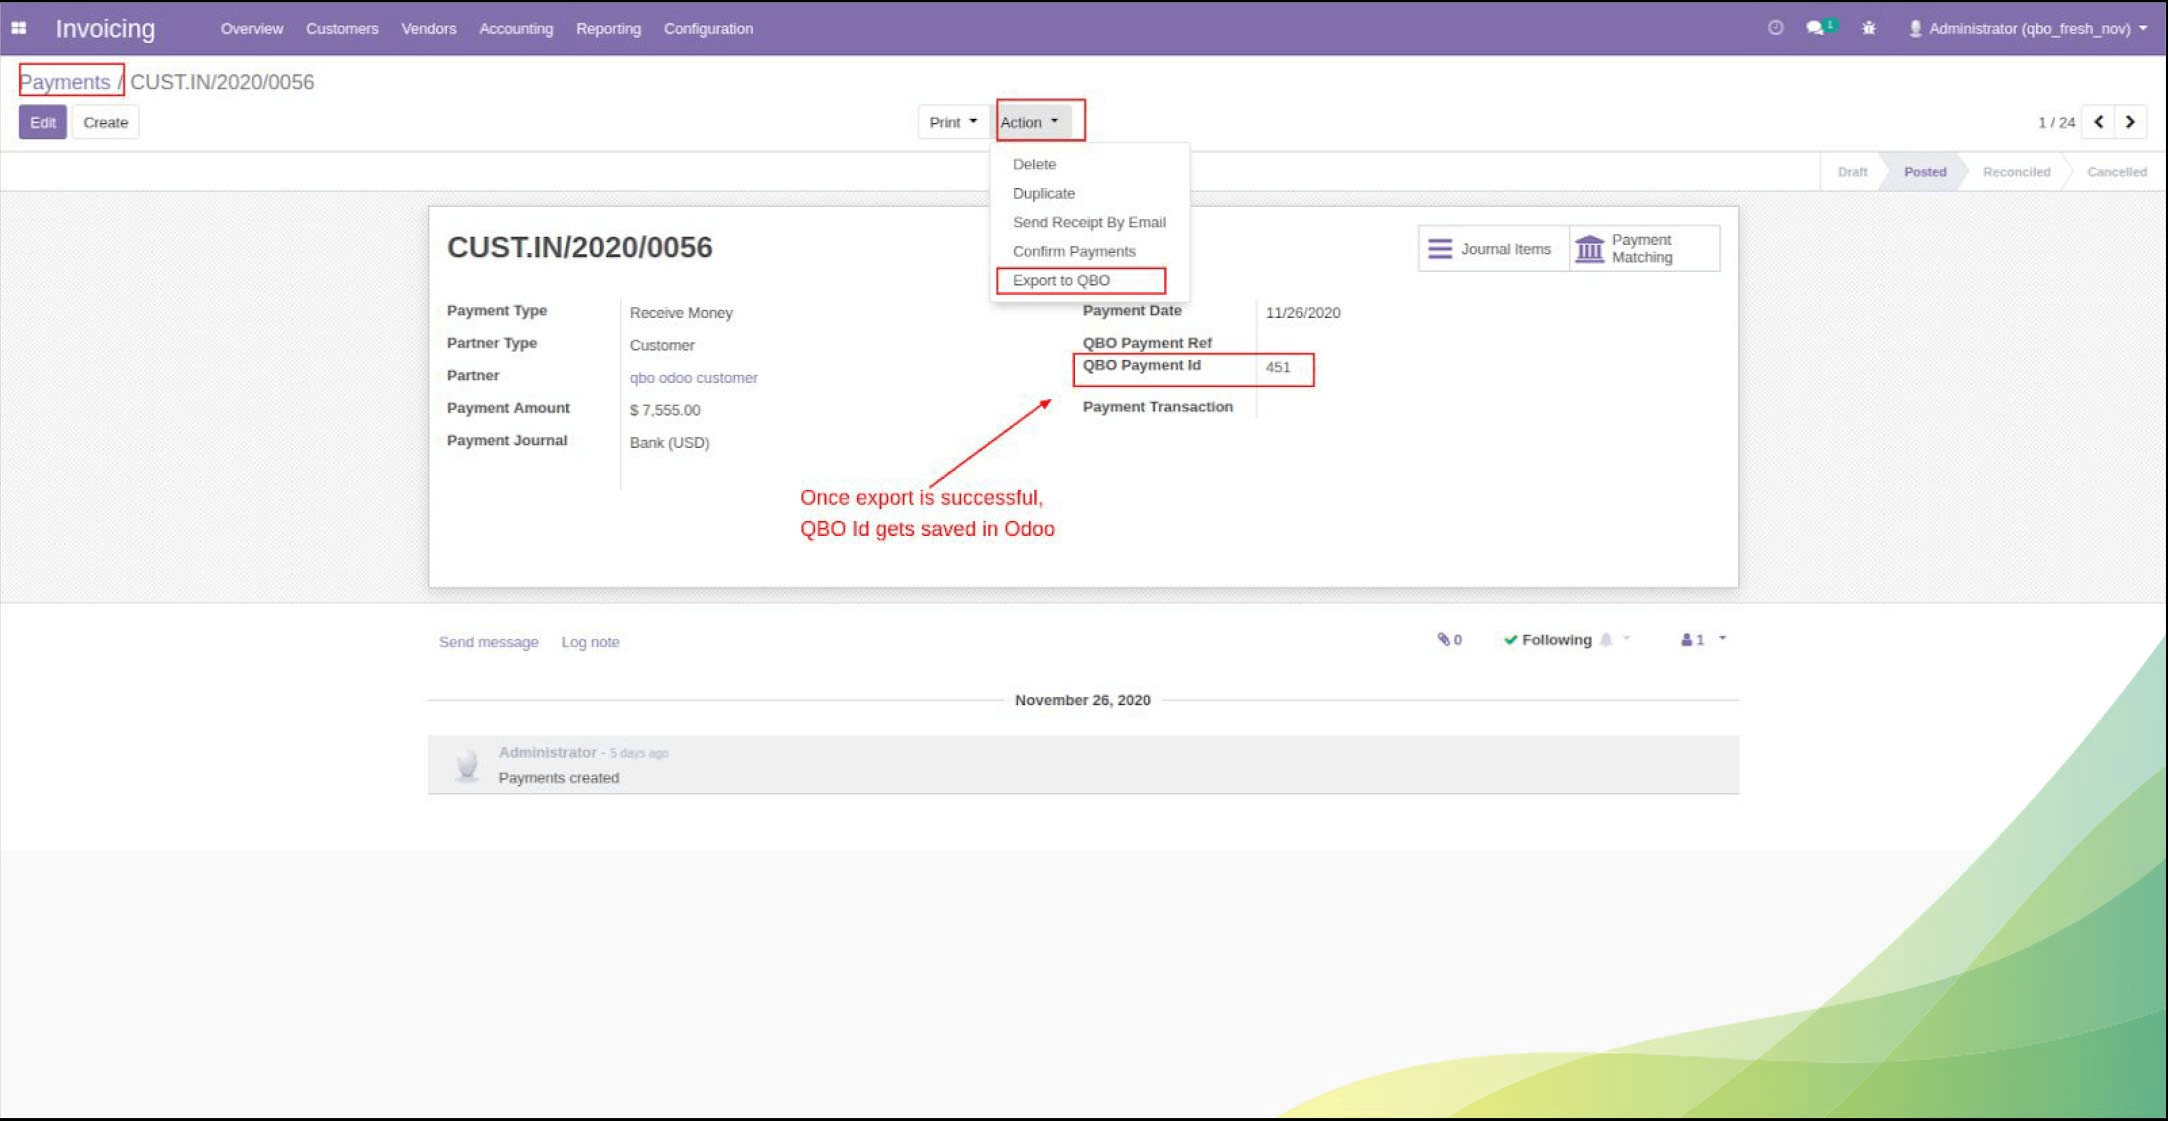
Customer Payment

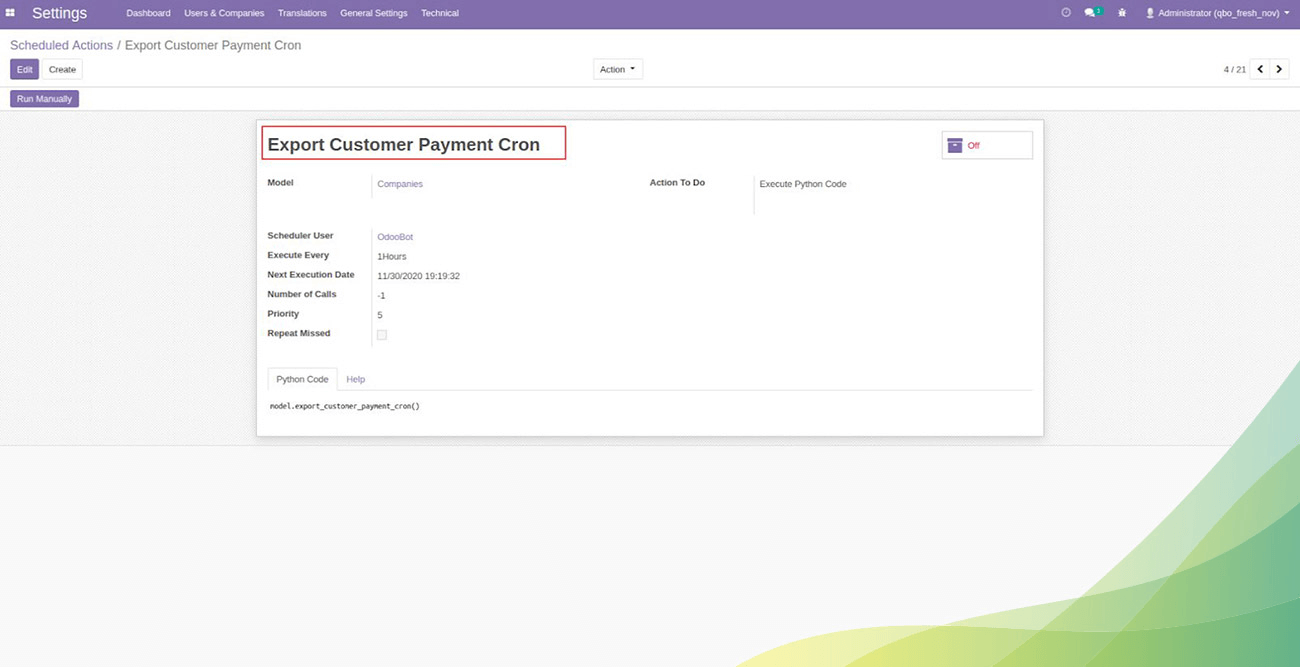
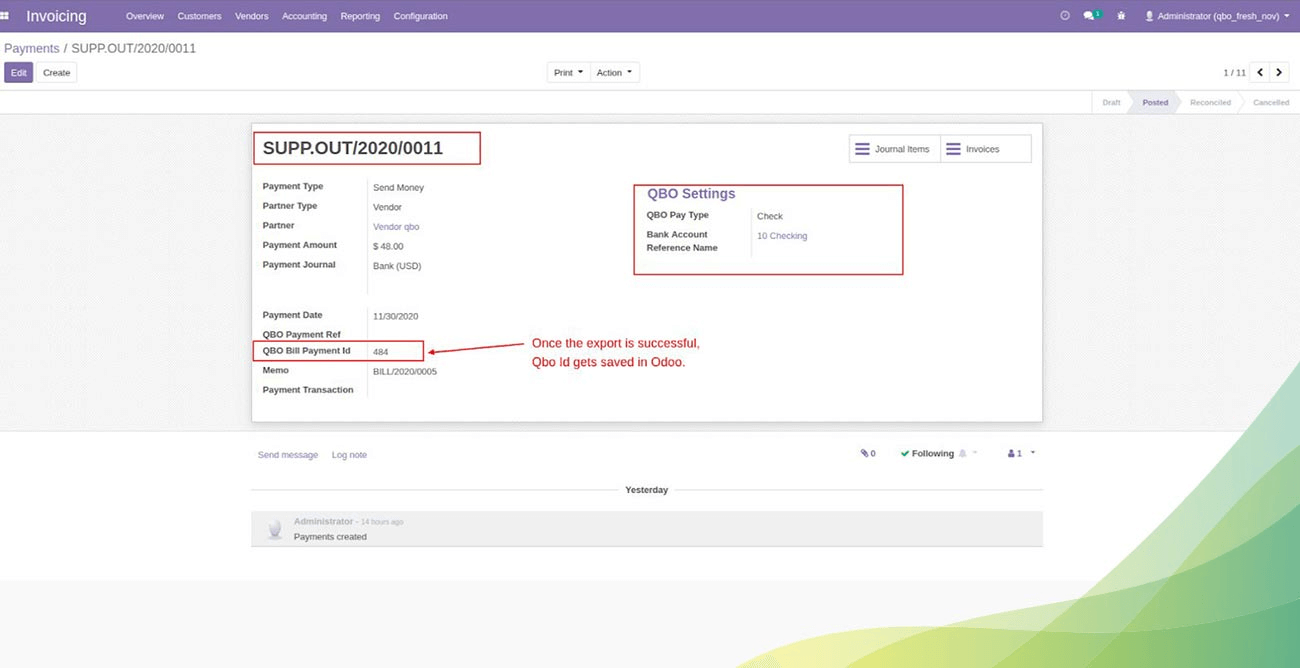
Vendor Payment

Inventory
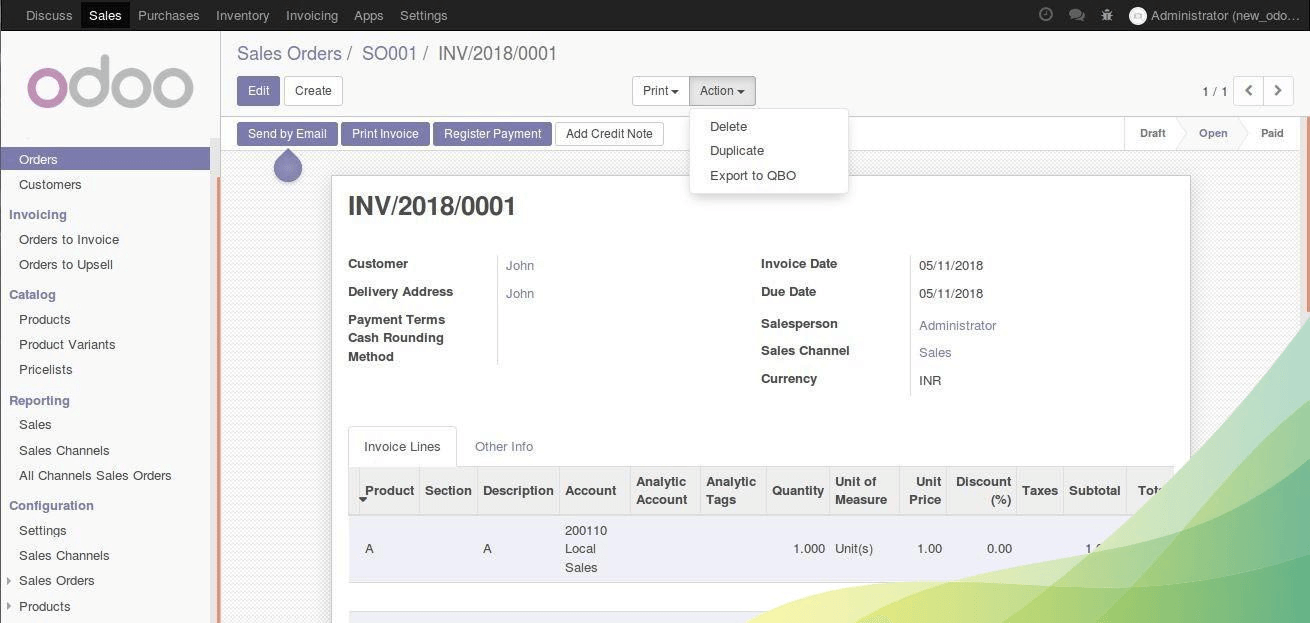
Invoice
Purchase Order
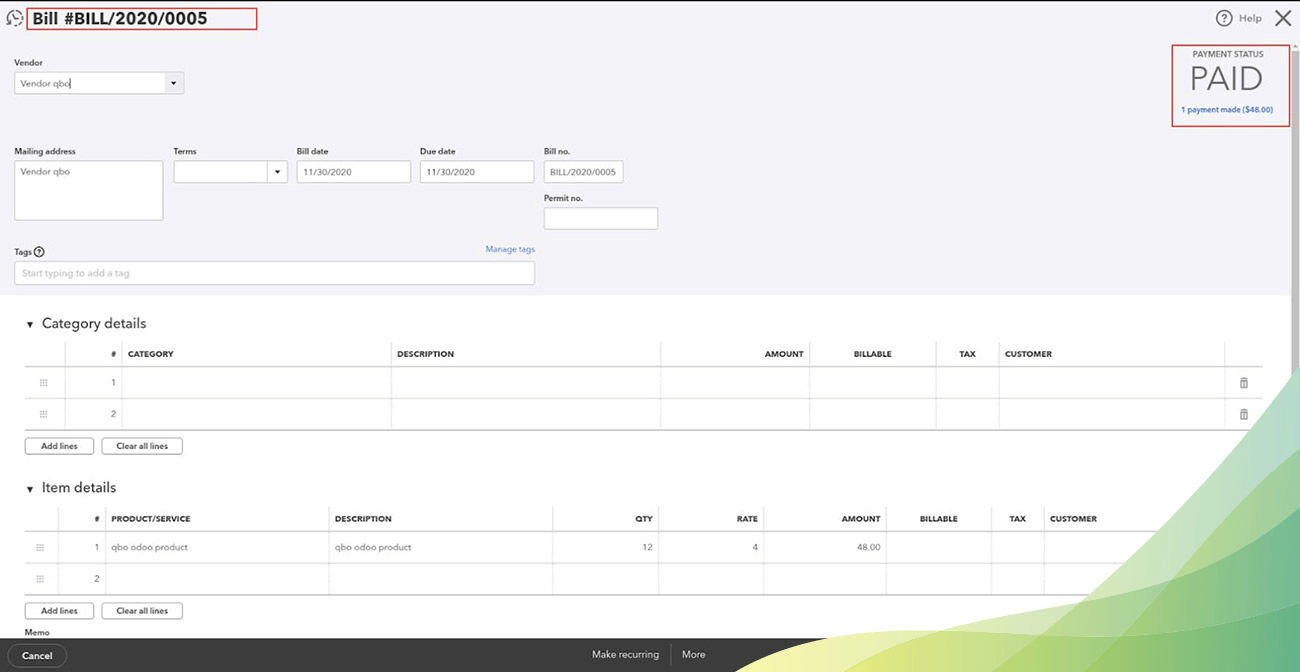
Vendor Bills

Employee

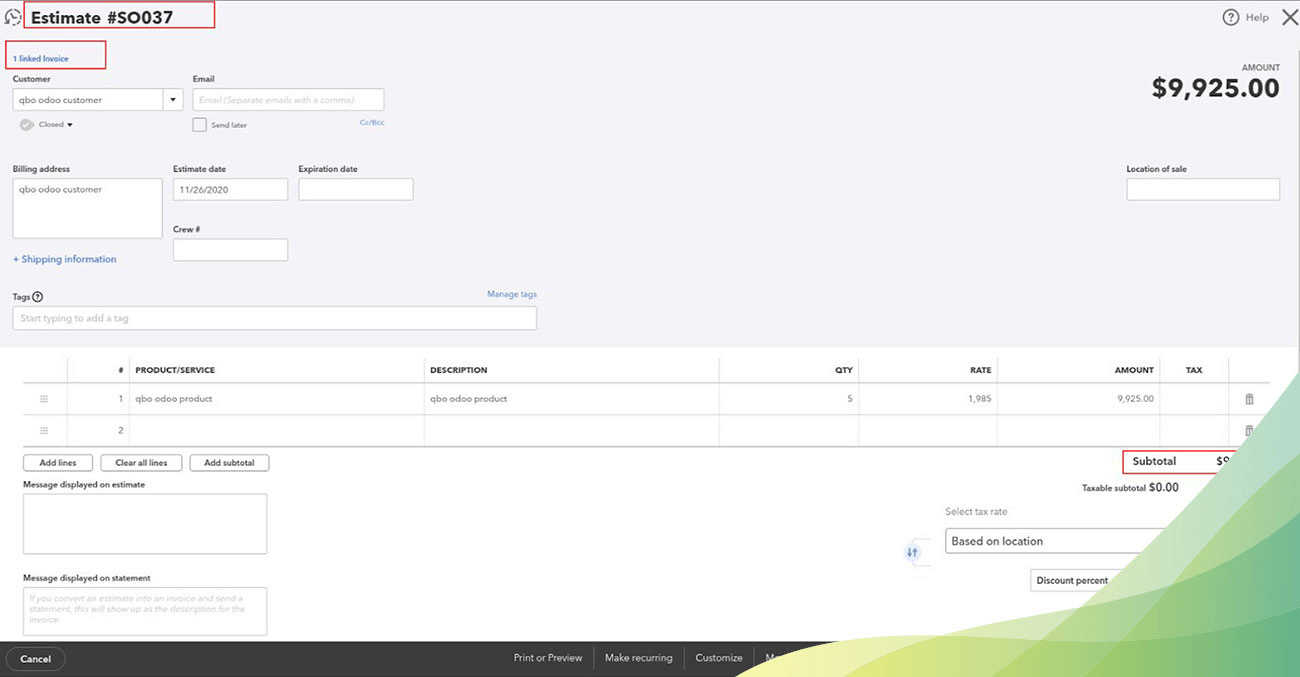
Sales Order
Customer
Vendor
Product Category
Payment Methods
Products
Purchase Order
Invoice
Employee
Customer Payment
Vendor Payment

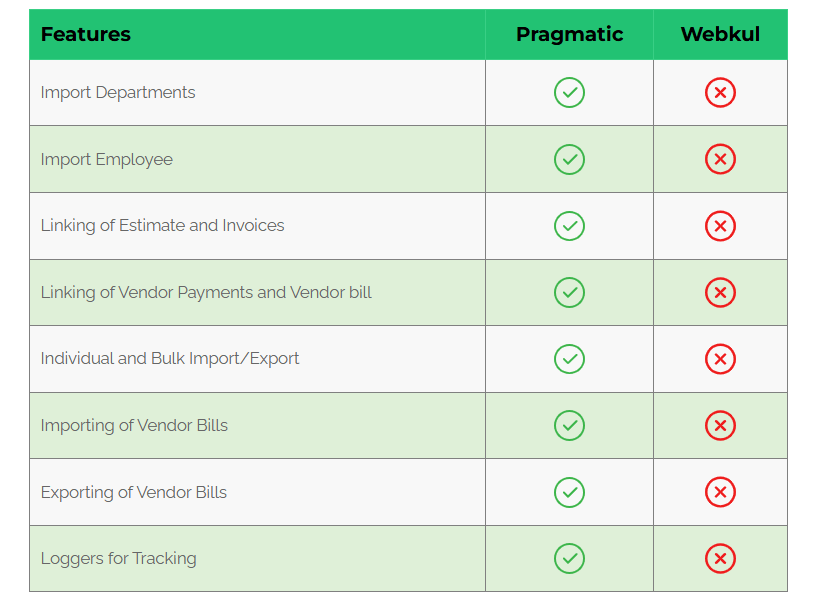
Department

Linking of Vendor Payments and Vendor bill